
Back in the day, there was no internet and only a few TV channels. What did people do with their time? Many had hobbies. One of the popular ones was Ham Radio. In the early days of radio, people built their own equipment. After some time, kits emerged and helped many more get into the hobby. Today, there are lots of choices in the ham radio hobby. You can build your own if you like to work with your hands, or buy something to get you on the air quickly. You still have to pass a test, but it is not as hard as it used to be, and Morse code is no longer required. We will delve into more options for Ham Radio in later articles.
If you want to get started right away, contact a local club.
In our readership area, there are a few clubs you can join:
Elizabeth City, NC https://www.taars.us/
Chesapeake, Va https://w4car.org/
Outer Banks, NC https://obraobx.com/
The Crystal Set is the most basic form of radio receiver. It requires minimal components and relies on the natural energy from radio waves to operate. Would you like to build one?
Let’s dive into the steps:
Components Needed:
- Coil (Inductor): You’ll need a coil, which can be made by winding wire around a cylindrical object (like a cardboard tube or a ferrite rod). This coil acts as an antenna to capture radio signals.
- Variable Capacitor (VC1): This component tunes the coil to the desired frequency. You can use a polythene dielectric variable capacitor (50pfd to 365pfd.
- Diode (D1): A germanium diode (such as 1N34A) serves as the detector. It allows the radio waves to pass in one direction only.
- Earphones: A crystal earpiece (relying on the piezoelectric effect) will work well. Avoid low-impedance “Walkman” type earphones.
- Aerial Wire: At least 20 meters long for better reception.
- Earth Connection: A buried biscuit tin or a meter of copper pipe driven into damp ground
Everything can be bought on eBay or Amazon, but try your local electronics store or Radio Shack if one is in your town (Elizabeth City has a Radio Shack).
It would be best to buy a Kit. Here is a link to an inexpensive kit to get you started.
https://www.mikeselectronicparts.com/product/crystal-radio-kit-6/
Here is another link on a different design
https://www.instructables.com/Build-an-antique-style-crystal-radio/
Circuit Diagram:
Steps:
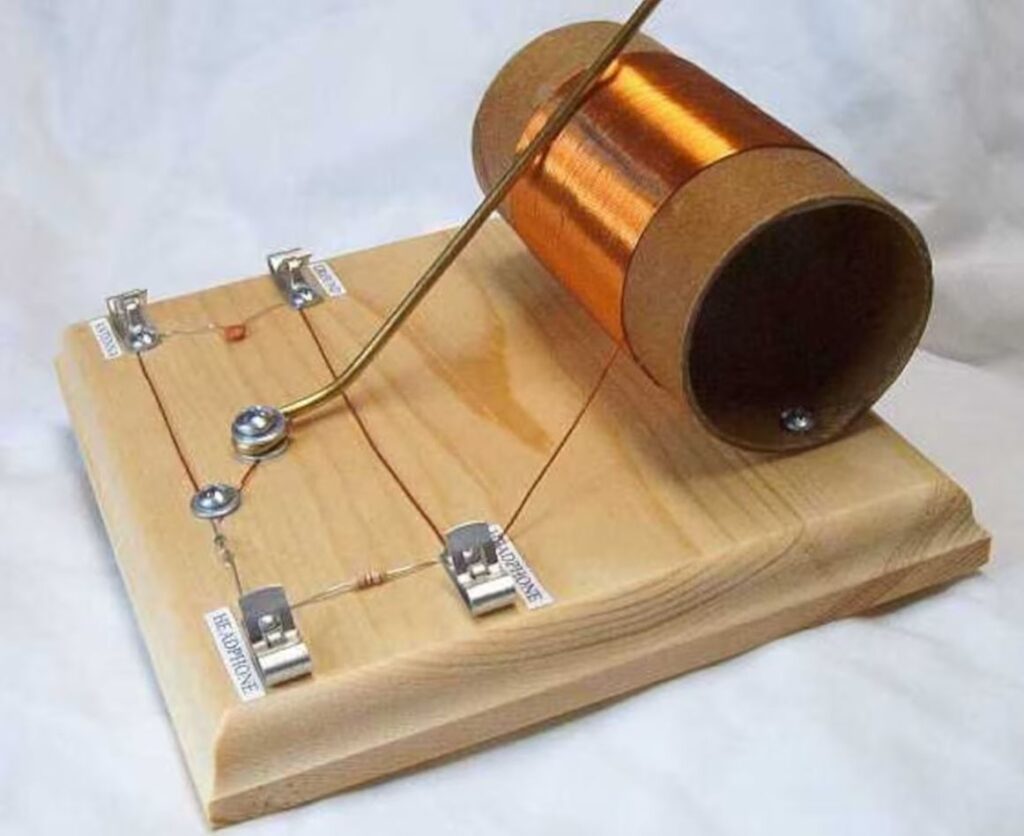
- Wind the Coil: Wind enameled copper wire around a cardboard tube or ferrite rod to create the coil. The longer the coil, the better the reception.
- Connect Components: Follow the circuit diagram. Connect the coil, variable capacitor, and diode as shown. The diode demodulates the signal, and the audio is fed directly to the earphones.
- Tune In: Adjust the variable capacitor (VC1) to tune the coil to the desired radio station frequency.
- Antenna and Earth: Set up a long aerial wire (at least 20 meters) and connect it to the coil. Create a good earth connection (buried biscuit tin or copper pipe).
- Listen: Put on your earphones and listen to the radio waves! Remember, there’s no amplification; it’s a direct conversion from radio waves to sound.
If you plan to make the above radio from scratch make sure you use a high impedance headphone (2000 ohms) or crystal earphone (1000 ohms), and the diode is germanium (e.g. 1N34A). You can use a variable capacitor (50pfd to 365pfd) and roll your own fixed coil by winding magnet wire (a hundred windings or so) around a cardboard or plastic tube or 1″ wood dowel; or you can use a fixed capacitor (220pfd) and turn your self-wound coil into a variable inductor by attaching only one end of the coil to the radio and making a sliding connection along the coil (by sanding the insulation off of a strip of the coil) as the other contact with the radio circuit. See below.
Drawbacks:
- No Amplification: Crystal sets lack amplification, so they’re sensitive only to strong signals. You can add a cheap amplifier (computer speakers are all around).
- Germanium Diode Limitations: Germanium diodes become less conductive below 0.2V, affecting sensitivity.
- Earphone Loading: The earphones dampen the tuned circuit, reducing selectivity.
Despite these limitations, building a crystal radio is a fun and educational project. It connects you directly to the magic of radio waves without any external power source.
Crystal radios are a fun start into the hobby of radio.
If you wish to dive into radio further, you can study for a Ham license and get into the world of Ham radio.
Stay tuned for more on amateur radio in a future article.
Happy tinkering!